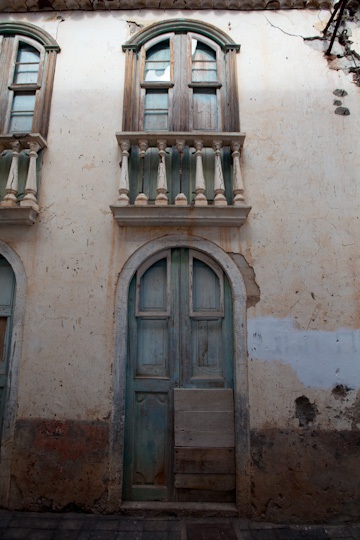
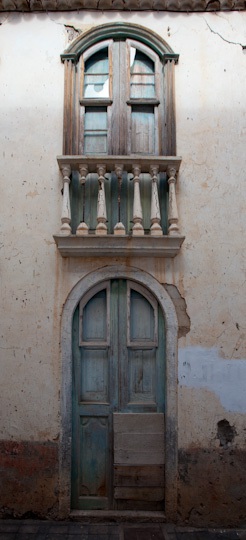
We have all taken images of buildings when we have to tilt the camera upwards to get the whole building in the frame. The result of tilting the camera upwards is that the perspective of the building is skewed with the verticals converging. The original below shows the converging verticals of an image of a ruined building in Agulo on La Gomera. Normally, I would take quite a few steps backwards to to minimise the converging of verticals, but as this house was in a narrow cobbled lane, I did not have this option.
The best way to correct for converging verticals is to use a camera or lens that enables tilt and shift movement of the lens, such as the Canon TSE lenses. Unfortunately, I do not have one of these specialist, extremely expensive tilt and shift lenses, so this option is not available to me.
An easy alternative is to correct the converging verticals in Adobe Photoshop using the ‘perspective’ functionality. The process is very simple: select the whole image, select the perspective tool found in the edit menu, drag a corner to skew (or more correctly un-skew) the image, and crop or trim the image appropriately, as illustrated below (click on a thumbnail to enlarge a screen grab). If there is one bit of functionality I would like Adobe to include in the next version of Lightroom then, without a shadow of a doubt, this would be perspective correction.
This is simple and very effective, but the quality of the resulting image cannot compete with that achieved using a tilt and shift lens. To achieve the best result with this edit, skew the bottom in rather than skew the top out, as the latter would result in image degradation due to interpolation.
The original and final image below show how this quick and simple edit can give you the result you desire.

